Enable Google Pay
Google Pay lets your customers pay quickly and securely using the cards saved to their Google account.
Once enabled, the Google Pay button will automatically appear on your Hosted Payment Page and Hosted Session SDK.
How to Enable Google Pay
Step 1: Contact Support
Reach out to your Relationship Manager or the Support team and request that Google Pay be enabled for your merchant account.
Step 2: Automatic Enablement (Hosted Payment Page & Hosted Session)
Once enabled by Support:
- Hosted Payment Page → Google Pay will display as an additional payment option.
- Hosted Session SDK → Google Pay will appear alongside card and other wallets.
No further action is required for these options.
Step 3: Additional Setup for Direct API Merchants
If you integrate using the Direct API, you must also configure Google Pay in your merchant dashboard:
-
Login to the N-Genius Portal.
-
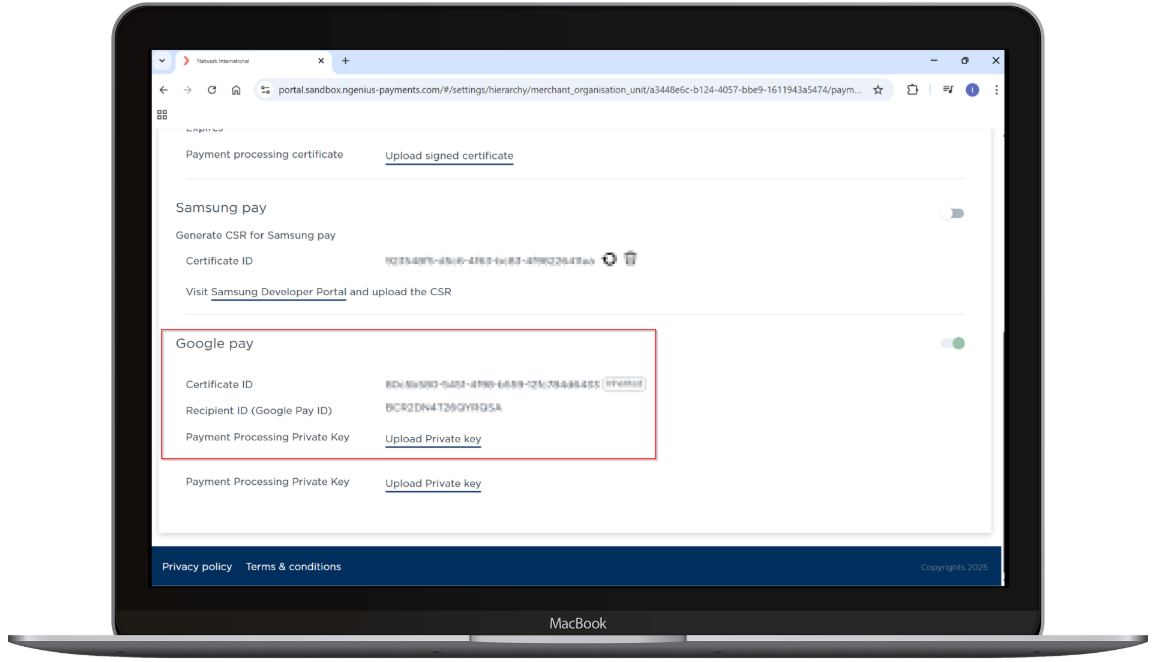
Navigate to Org Hierarchy → Payment Channels → Wallet.
-
Select Google Pay.
-
Add the following details:
-
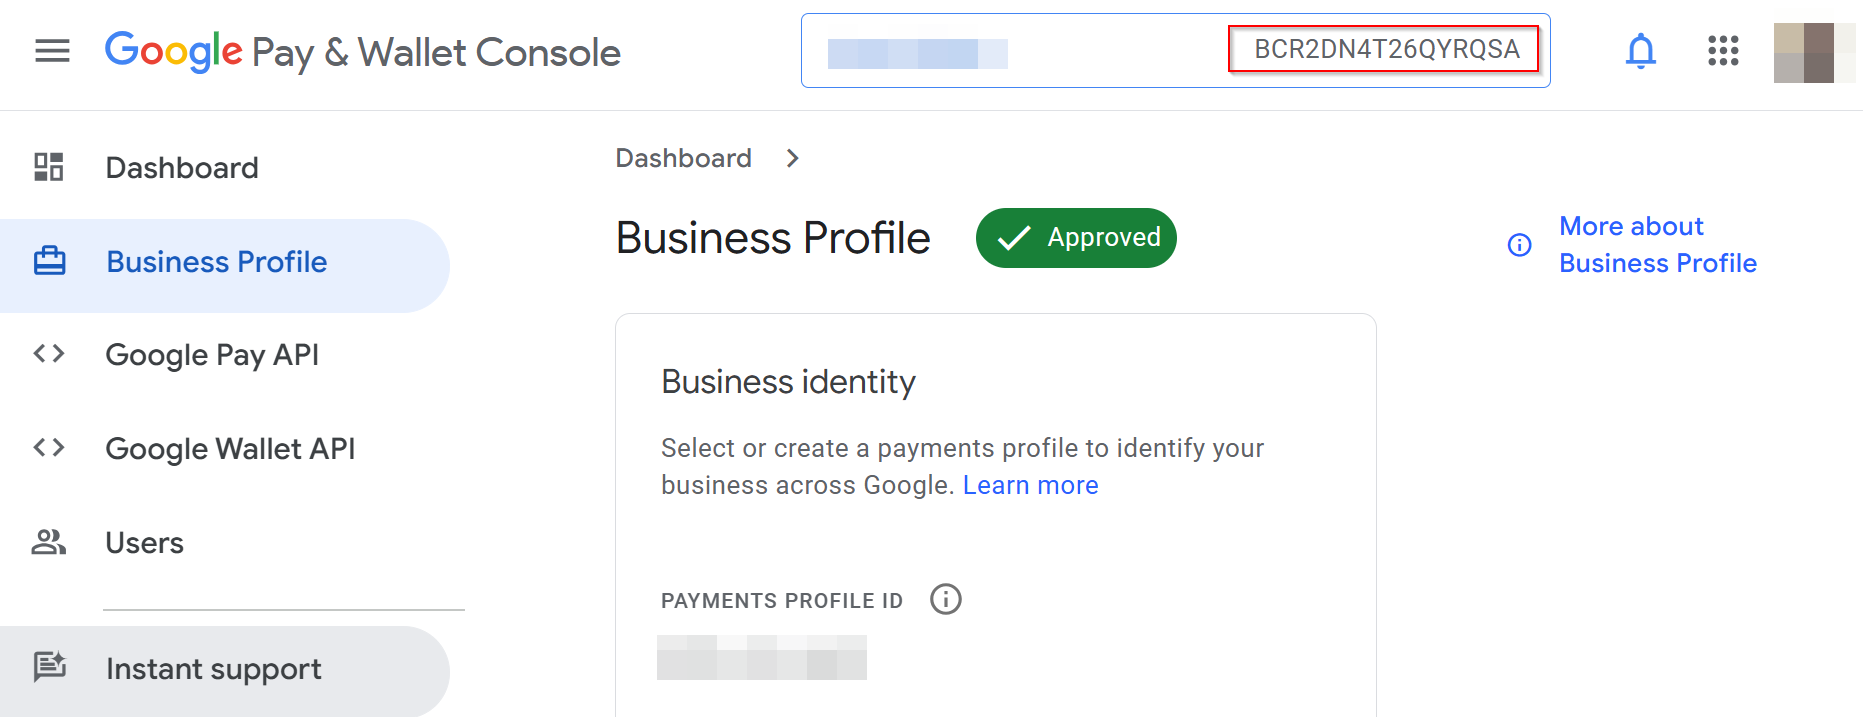
Recipient ID → Retrieve your Recipient ID from your Google Pay & Wallet Console under your Business Profile. This ID uniquely identifies your merchant account and must be entered exactly as shown.
-
Certificate / Private Key → Upload your private key file.
- You can generate key pairs using OpenSSL.
- Alternatively, upload the private key using the API (see Developer Guide).
-
If you are integrating a custom pay page, see the Google Pay – API Web Integration Guide.
Notes
- For most merchants, Support enablement is enough — the Google Pay button appears automatically in Hosted solutions.
- Direct API merchants must configure Recipient ID and certificates in Wallet settings.
- Certificates can be uploaded manually in the portal or via API call.
- Always test in sandbox before going live.
Related Links
Updated 3 months ago